%20--%3e%3cdefs%3e%3cstyle%3e%20.st0%20{%20fill:%20%23061b40;%20}%20.st1%20{%20fill:%20%23306af1;%20}%20.st2%20{%20fill:%20%235ce5cf;%20}%20%3c/style%3e%3c/defs%3e%3cg%3e%3cpath%20class='st0'%20d='M55,10.5h9v3h-9v9h12V7.5h-12v3ZM64,19.5h-6v-3h6v3Z'/%3e%3cpolygon%20class='st0'%20points='69%2016.5%2078%2016.5%2078%2019.5%2069%2019.5%2069%2022.5%2081%2022.5%2081%2013.5%2072%2013.5%2072%2010.5%2081%2010.5%2081%207.5%2069%207.5%2069%2016.5'/%3e%3cpolygon%20class='st0'%20points='95%2010.5%2095%207.5%2083%207.5%2083%2022.5%2095%2022.5%2095%2019.5%2086%2019.5%2086%2016.5%2095%2016.5%2095%2013.5%2086%2013.5%2086%2010.5%2095%2010.5'/%3e%3cpath%20class='st0'%20d='M40,1.5v21h11.6l1.4-1.4v-7.6h0c0,0-1.4-1.5-1.4-1.5l1.4-1.4V2.9l-1.4-1.4h-11.6ZM50,19.5h-7v-6h7v6ZM50,10.5h-7v-6h7v6Z'/%3e%3c/g%3e%3cpath%20class='st1'%20d='M23.1,24L14.7,4.8l-4.9,11.2h3.8l-1.8,4H3.3L12.1,0H2C.9,0,0,.9,0,2v20c0,1.1.9,2,2,2h21.1Z'/%3e%3cpath%20class='st2'%20d='M34,0h-16.8l10.6,24h6.2c1.1,0,2-.9,2-2V2C36,.9,35.1,0,34,0ZM32.5,20h-4V4h4v16Z'/%3e%3c/svg%3e)
Model Overview
Model Features
Model Capabilities
Use Cases
🚀 Wan-Fun
😊 Welcome! This project is designed for text-to-video generation, offering a powerful solution for creating high - quality videos from text inputs.
🚀 Quick Start
1. Cloud Usage: AliyunDSW/Docker
a. Via Alibaba Cloud DSW
DSW offers free GPU time, which users can apply for once. The free GPU time is valid for 3 months after application.
Alibaba Cloud provides free GPU time on Freetier. You can obtain it and use it in Alibaba Cloud PAI - DSW. CogVideoX - Fun can be launched within 5 minutes.

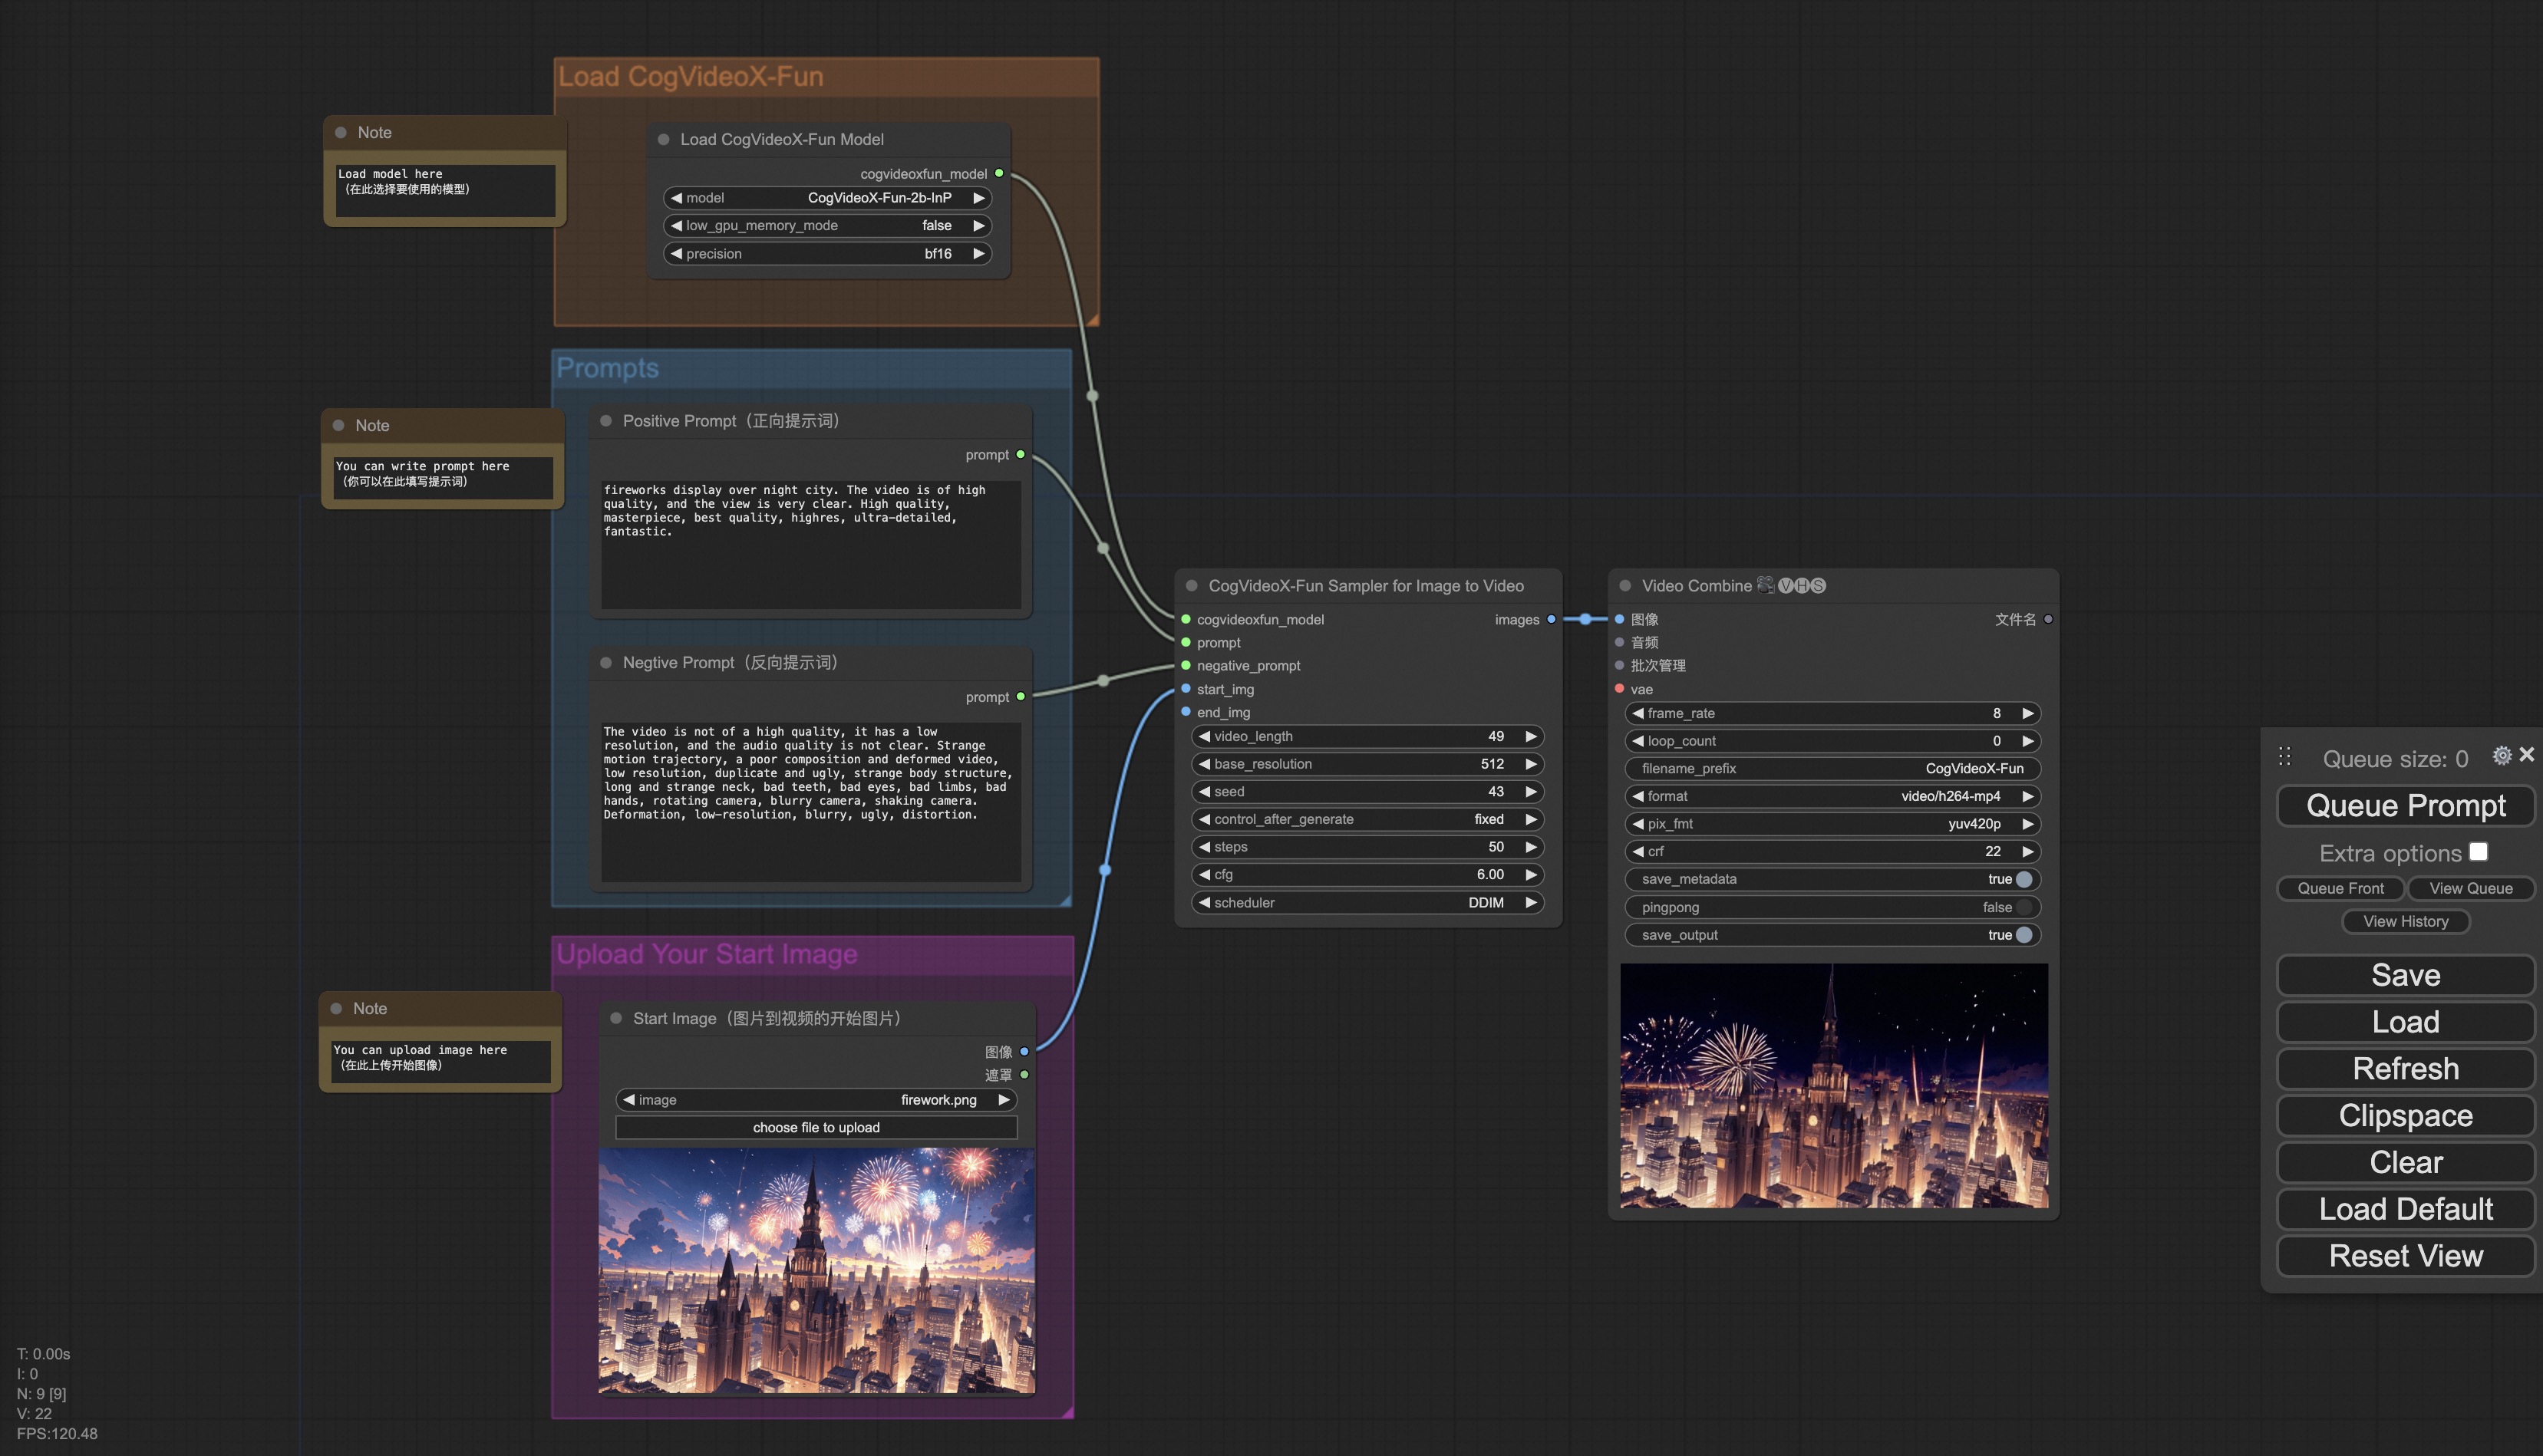
b. Via ComfyUI
Our ComfyUI interface is as follows. For details, check ComfyUI README.
c. Via Docker
If you use Docker, make sure that the graphics card driver and CUDA environment are correctly installed on your machine. Then execute the following commands in sequence:
# pull image
docker pull mybigpai-public-registry.cn-beijing.cr.aliyuncs.com/easycv/torch_cuda:cogvideox_fun

# enter image
docker run -it -p 7860:7860 --network host --gpus all --security-opt seccomp:unconfined --shm-size 200g mybigpai-public-registry.cn-beijing.cr.aliyuncs.com/easycv/torch_cuda:cogvideox_fun

# clone code
git clone https://github.com/aigc-apps/CogVideoX-Fun.git

# enter CogVideoX-Fun's dir
cd CogVideoX-Fun

# download weights
mkdir models/Diffusion_Transformer
mkdir models/Personalized_Model

# Please use the hugginface link or modelscope link to download the model.
# CogVideoX-Fun
# https://huggingface.co/alibaba-pai/CogVideoX-Fun-V1.1-5b-InP
# https://modelscope.cn/models/PAI/CogVideoX-Fun-V1.1-5b-InP

# Wan
# https://huggingface.co/alibaba-pai/Wan2.1-Fun-14B-InP
# https://modelscope.cn/models/PAI/Wan2.1-Fun-14B-InP
2. Local Installation: Environment Check/Download/Installation
a. Environment Check
We have verified that this library can be executed in the following environments:
Details for Windows:
- Operating System: Windows 10
- Python: python3.10 & python3.11
- PyTorch: torch2.2.0
- CUDA: 11.8 & 12.1
- CUDNN: 8+
- GPU: Nvidia - 3060 12G & Nvidia - 3090 24G
Details for Linux:
- Operating System: Ubuntu 20.04, CentOS
- Python: python3.10 & python3.11
- PyTorch: torch2.2.0
- CUDA: 11.8 & 12.1
- CUDNN: 8+
- GPU: Nvidia - V100 16G & Nvidia - A10 24G & Nvidia - A100 40G & Nvidia - A100 80G
You need approximately 60GB of available disk space. Please check!
b. Weight Placement
It is recommended to place the weights in the specified paths:
📦 models/
├── 📂 Diffusion_Transformer/
│   ├── 📂 CogVideoX-Fun-V1.1-2b-InP/
│   ├── 📂 CogVideoX-Fun-V1.1-5b-InP/
│   ├── 📂 Wan2.1-Fun-14B-InP
│   └── 📂 Wan2.1-Fun-1.3B-InP/
├── 📂 Personalized_Model/
│   └── your trained trainformer model / your trained lora model (for UI load)
✨ Features
Model Address
V1.0:
| Name | Storage Space | Hugging Face | Model Scope | Description |
|---|---|---|---|---|
| Wan2.1 - Fun - 1.3B - InP | 19.0 GB | 🤗Link | 😄Link | The weights for text - to - video generation of Wan2.1 - Fun - 1.3B, trained at multiple resolutions, support the prediction of the first and last frames. |
| Wan2.1 - Fun - 14B - InP | 47.0 GB | 🤗Link | 😄Link | The weights for text - to - video generation of Wan2.1 - Fun - 14B, trained at multiple resolutions, support the prediction of the first and last frames. |
| Wan2.1 - Fun - 1.3B - Control | 19.0 GB | 🤗Link | 😄Link | The video control weights of Wan2.1 - Fun - 1.3B, support different control conditions such as Canny, Depth, Pose, MLSD, etc., and also support trajectory control. Support video prediction at multiple resolutions (512, 768, 1024), trained with 81 frames at 16 frames per second, support multi - language prediction. |
| Wan2.1 - Fun - 14B - Control | 47.0 GB | 🤗Link | 😄Link | The video control weights of Wan2.1 - Fun - 14B, support different control conditions such as Canny, Depth, Pose, MLSD, etc., and also support trajectory control. Support video prediction at multiple resolutions (512, 768, 1024), trained with 81 frames at 16 frames per second, support multi - language prediction. |
Video Works
Wan2.1 - Fun - 14B - InP && Wan2.1 - Fun - 1.3B - InP
Wan2.1 - Fun - 14B - Control && Wan2.1 - Fun - 1.3B - Control
💻 Usage Examples
1. Generation
a. Memory - Saving Solution
Since the parameters of Wan2.1 are very large, we need to consider a memory - saving solution to adapt to consumer - grade graphics cards. We provide a GPU_memory_mode for each prediction file, which can be selected from model_cpu_offload, model_cpu_offload_and_qfloat8, and sequential_cpu_offload. This solution is also applicable to the generation of CogVideoX - Fun.
model_cpu_offloadmeans that the entire model will be transferred to the CPU after use, which can save some video memory.model_cpu_offload_and_qfloat8means that the entire model will be transferred to the CPU after use, and the transformer model is quantized to float8, which can save more video memory.sequential_cpu_offloadmeans that each layer of the model will be transferred to the CPU after use. It is slower but can save a large amount of video memory.
qfloat8 will partially reduce the performance of the model but can save more video memory. If the video memory is sufficient, it is recommended to use model_cpu_offload.
b. Via ComfyUI
For details, check ComfyUI README.
c. Run Python Files
- Step 1: Download the corresponding weights and place them in the
modelsfolder. - Step 2: Use different files for prediction according to different weights and prediction targets. Currently, this library supports CogVideoX - Fun, Wan2.1, and Wan2.1 - Fun, which are distinguished by folder names in the
examplesfolder. Different models support different functions, so please make distinctions according to the specific situation. Take CogVideoX - Fun as an example.- Text - to - video:
- Modify
prompt,neg_prompt,guidance_scale, andseedin theexamples/cogvideox_fun/predict_t2v.pyfile. - Then run the
examples/cogvideox_fun/predict_t2v.pyfile and wait for the generation result. The result will be saved in thesamples/cogvideox - fun - videosfolder.
- Modify
- Image - to - video:
- Modify
validation_image_start,validation_image_end,prompt,neg_prompt,guidance_scale, andseedin theexamples/cogvideox_fun/predict_i2v.pyfile. validation_image_startis the starting image of the video, andvalidation_image_endis the ending image of the video.- Then run the
examples/cogvideox_fun/predict_i2v.pyfile and wait for the generation result. The result will be saved in thesamples/cogvideox - fun - videos_i2vfolder.
- Modify
- Video - to - video:
- Modify
validation_video,validation_image_end,prompt,neg_prompt,guidance_scale, andseedin theexamples/cogvideox_fun/predict_v2v.pyfile. validation_videois the reference video for video - to - video generation. You can use the following video for demonstration: Demo Video- Then run the
examples/cogvideox_fun/predict_v2v.pyfile and wait for the generation result. The result will be saved in thesamples/cogvideox - fun - videos_v2vfolder.
- Modify
- Normal control - to - video (Canny, Pose, Depth, etc.):
- Modify
control_video,validation_image_end,prompt,neg_prompt,guidance_scale, andseedin theexamples/cogvideox_fun/predict_v2v_control.pyfile. control_videois the control video for control - to - video generation, which is a video extracted by operators such as Canny, Pose, Depth, etc. You can use the following video for demonstration: Demo Video- Then run the
examples/cogvideox_fun/predict_v2v_control.pyfile and wait for the generation result. The result will be saved in thesamples/cogvideox - fun - videos_v2v_controlfolder.
- Modify
- Text - to - video:
- Step 3: If you want to combine other backbones and LoRA models you trained, modify
lora_pathinexamples/{model_name}/predict_t2v.pyandexamples/{model_name}/predict_i2v.pyaccording to the situation.
d. Via UI Interface
The webui supports text - to - video, image - to - video, video - to - video, and normal control - to - video (Canny, Pose, Depth, etc.). Currently, this library supports CogVideoX - Fun, Wan2.1, and Wan2.1 - Fun, which are distinguished by folder names in the examples folder. Different models support different functions, so please make distinctions according to the specific situation. Take CogVideoX - Fun as an example.
- Step 1: Download the corresponding weights and place them in the
modelsfolder. - Step 2: Run the
examples/cogvideox_fun/app.pyfile and enter the Gradio page. - Step 3: Select the generation model on the page, fill in
prompt,neg_prompt,guidance_scale,seed, etc., click "Generate", and wait for the generation result. The result will be saved in thesamplefolder.
📚 Documentation
References
- CogVideo: https://github.com/THUDM/CogVideo/
- EasyAnimate: https://github.com/aigc-apps/EasyAnimate
- Wan2.1: https://github.com/Wan-Video/Wan2.1/
📄 License
This project is licensed under the Apache License (Version 2.0).